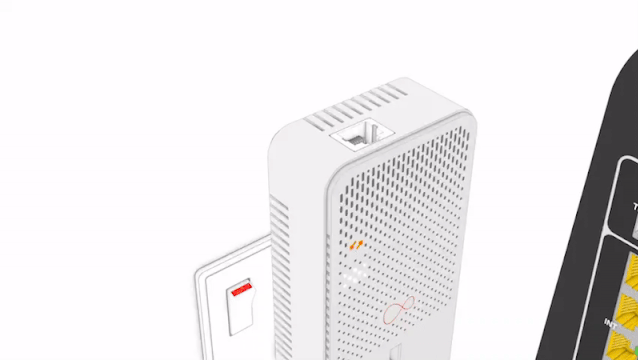
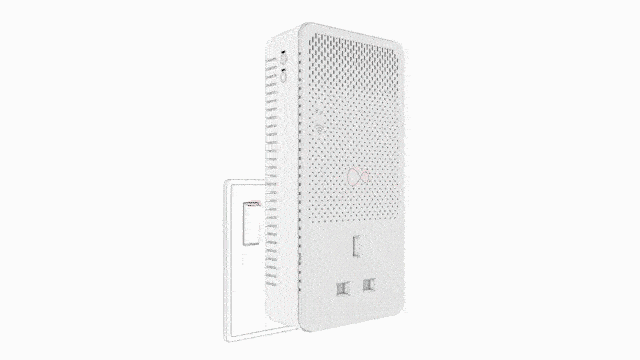
What's a powerline Booster?
Our intelligent Boosters: WiFi and Wired, use your home's internal electrical wiring to help connect your devices to the Hub – from any room with a working socket.
Virgin WiFi Boosters can help tackle WiFi blackspots and are perfect for places where your existing home network won't reach.
A Virgin Media Booster can be used for any type of Hub or connection and will boost the signal significantly in under 200 square feet (50m), by picking up signals from far away connections via an antennae that’s attached to it.
This device then transfers those boosted frequencies through an Ethernet cable, back into your home WiFi settings so you can enjoy faster speeds, without buffering issues.
Do I need a Booster?
If you’re experiencing poor WiFi coverage in your house, or office, then a WiFi Booster will help:
• It can be used to extend WiFi coverage throughout the whole home.
• Reduce connection problems on multiple devices.
Setting up your first Booster
Follow these simple instructions to install the Booster. Or, take a look at our installation guide
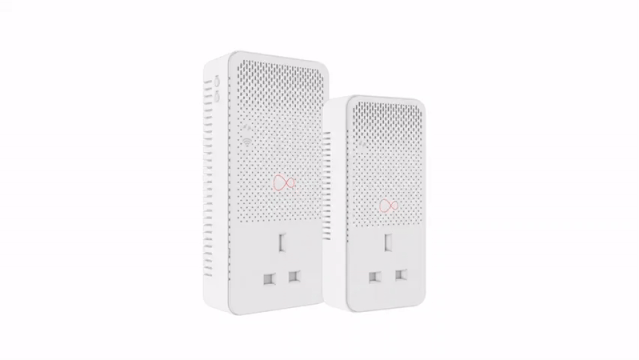
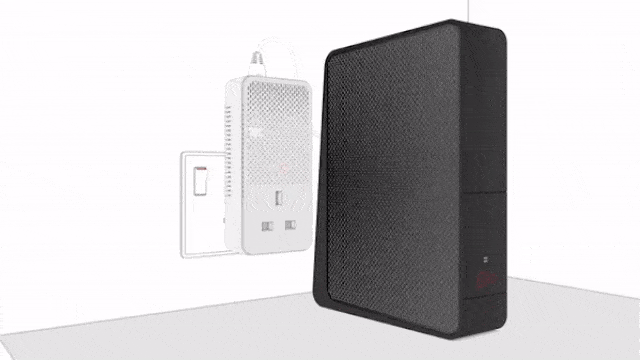
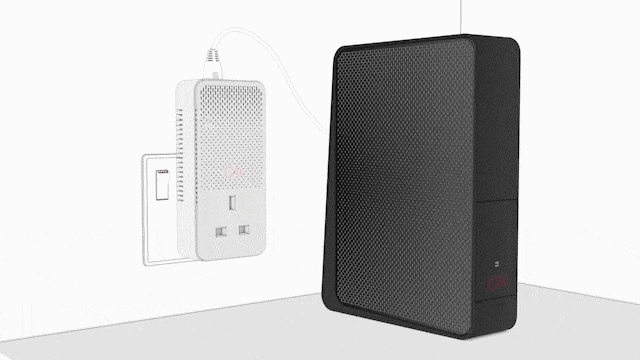
There are two Boosters in your pack. Take the smaller one first and plug it into a mains socket, next to the Hub. After the lights have flashed on, connect the Booster to the Hub, using the Ethernet cable provided.
Note: Make sure you plug the Booster directly into a mains socket, not an extention lead, power strip or surge protector.
Plug the larger Booster into a mains socket, in the same room, and switch it on. Leave for around 15 minutes to pair up to the smaller Booster and download the latest software updates.
It’s important to leave the Boosters alone during this time, so that everything works properly.
Press and hold the WPS button on the larger Booster for about 10 seconds and release it. The wireless and power lights will start to blink.
Press and hold the WPS/Virgin Media button on the Hub until the lights start blinking. The Boosters will then start copying the Hub’s details.
You’ll know when the copying process is done as the wireless light on the larger Booster will stop blinking and go off. The power light will stay on.
You can now unplug the larger Booster and move it to where you need in your home.
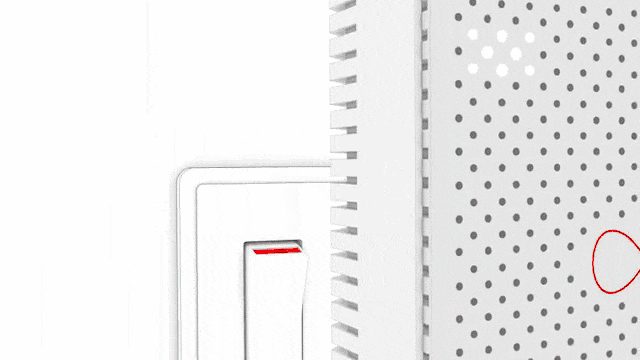
Make sure you choose an internal wall, free from obstructions, such as: cupboards and shelves – with lots of ventilation.
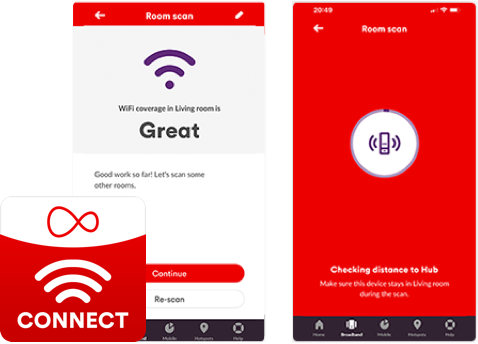
You can use the Virgin Media Connect app to scan your home and smooth out any snags.
Setting up an additional Booster
Plug the additional Booster into a mains socket, in the same room as the Booster that is connected to the Hub. Now switch it on.
The Power light will come on – and the Connection light will flash amber. When ready to be paired, the Connection light will flash red.
On the existing Booster, that’s already connected to the Hub, hold the Sync button on the side for 3 seconds. The Connection light will start to flash very quickly. Within 2 minutes, hold the Sync button on the additional Booster for 3 seconds. Once paired, the Connection lights will go out on both Boosters.
You can now unplug the additional Booster and move it to where you need in your home.
Make sure you choose an internal wall, free from obstructions, such as: cupboards and shelves – with lots of ventilation.

Virgin Media's Boosters use G.Hn technology and will only connect with other kit using G.Hn. You won't be able to connect Powerline adaptors, using HomePlug technology, to your Booster network.
If you’ve a Virgin Media Booster, use the tip of a pen to press the Reset button on the additional Booster, for 7 seconds. This will return it to the default factory settings, then follow the steps to try pairing again.
Why is my Virgin WiFi Booster not working?
There are a number of reasons why the Booster isn’t working. Here are the most common – and what to look out for:
Find the Booster's happy place
Use power sockets on internal walls, but don’t use extension cables.
Avoid direct obstruction to the Booster, such as cupboards or shelves.
Position away from devices that may cause interference i.e. chargers.
Provide ventilation as the Boosters can get very warm while in use.
Quick Checks

Repeat this for all Boosters in your home: turn the power off, unplug and plug back in. Then switch the power on.
Check the Ethernet cable is securely connected from the main Booster and the Hub.
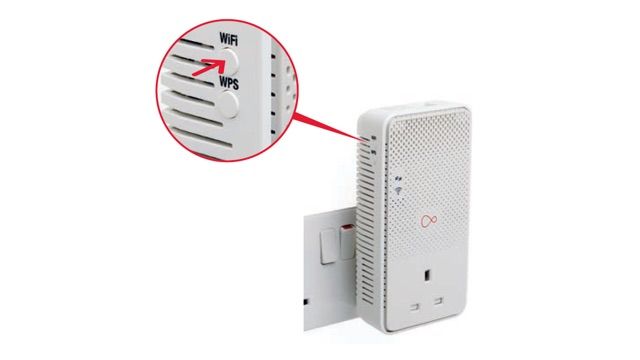
Make sure you haven’t pressed the WiFi button on the side of the Booster, as this turns the WiFi on and off.
The Boosters are paired correctly if the connection lights (arrows) and the WiFi light are off. The power light (dots) will stay on.
Additional Checks
Move the Booster to another socket – ideally an internal wall. And away from interfering devices with a motor – like a washing machine.
If the connect light’s flashing red, and the power light’s solide white – the pairing has failed. To try again:
Press the sync button, on the side of the Booster connected to the Hub, for 3 seconds. A light should flash quickly.
Now, press the sync button on the second Booster for 3 seconds. This light will also flash quickly.
The Boosters are successfully paired when the lights stop flashing.
Use a pen tip to press the rest button for 7 seconds – on all the Boosters in your home. Then follow the steps to set them up again in our installation guide
Slow speed checks
If your WiFi Booster is working – but slowly, you can check your broadband speed or follow these steps to speed it up again:
Turn WiFi on and off
It may sound simple but try turning the WiFi setting off and on again from the device you are using to find a stronger signal.Move closer to the Booster
Try moving to a different room or closer to the Booster before connecting the deviceRelocate the Booster
Move the Booster to another socket – ideally an internal wall and away from interfering devices with a motor like a washing machine.